If you haven't ever installed a skin for Invision Power Board, feel free and follow those steps.
First unzip files which you have downloaded with WinZip, WinRAR or any other program.
Make sure that are files beginning with "ipb_skin-" and "ipb_images-", after "-" it should be a skin name or something like this :-)
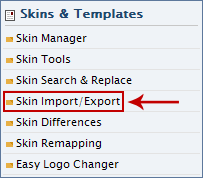
Now enter your forum admin area. Find "Look & Feel" in the top navigatio bar. Click it.
After new page loads, in the right side find "Skin Import/Export", click on it.
Scroll down a bit and find "Importing..." section and click "Choose..." as shown in example.
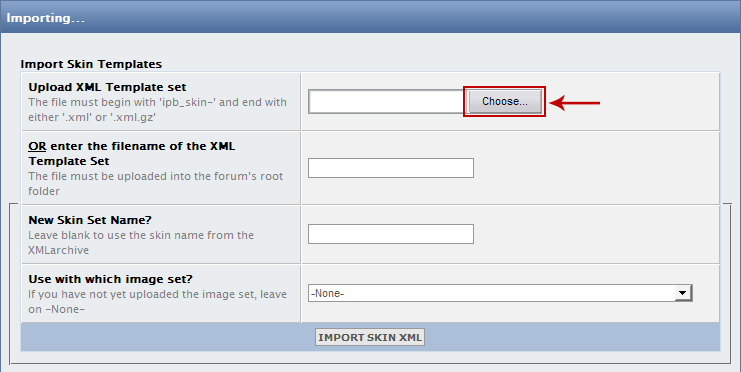
Now find unzipped files and select "ipb_skin-" + skin name, for example:
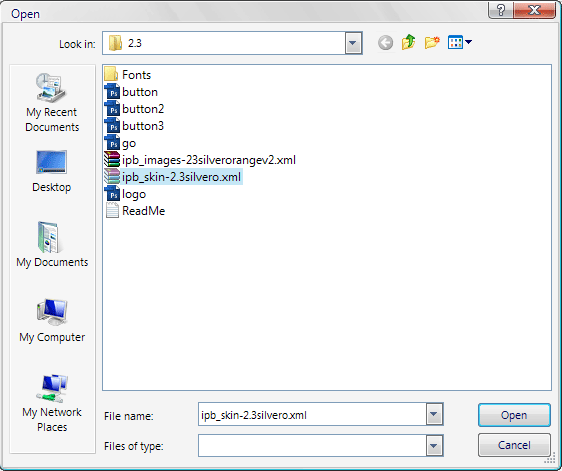
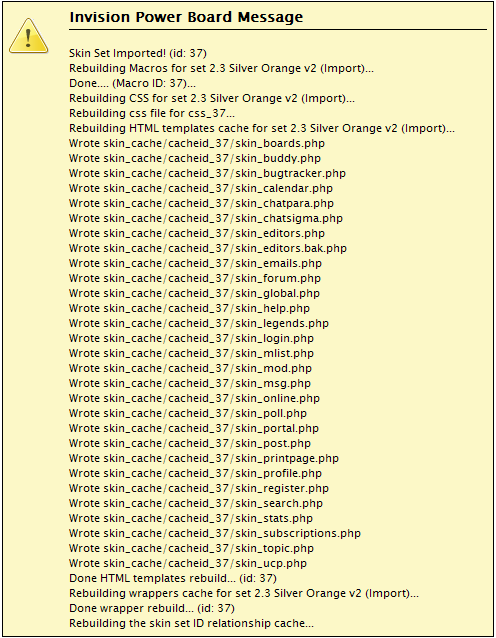
click "IMPORT SKIN XML". Wait till it loads now and you should see something like this:
Now let's do the same, but with skin images. Just right after "Import Skin Templates" you will see "Import Skin Images". Click "Choose..."
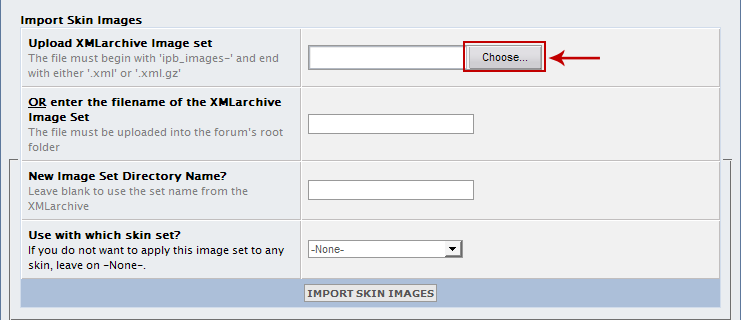
Select "ipb_images-" + skin name and click "IMPORT SKIN IMAGES". Wait till it loads. You should see something like this:

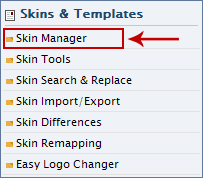
Now find "Skin Manager" in the left menu and click it.
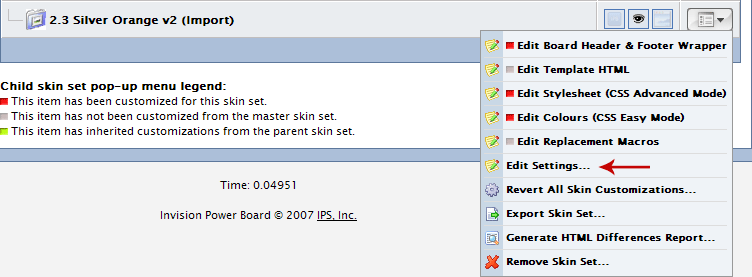
Scroll to the bottom and find our imported skin.

Click on the skin icon in the right side.
Menu should appear. Click on "Edit Settings..."
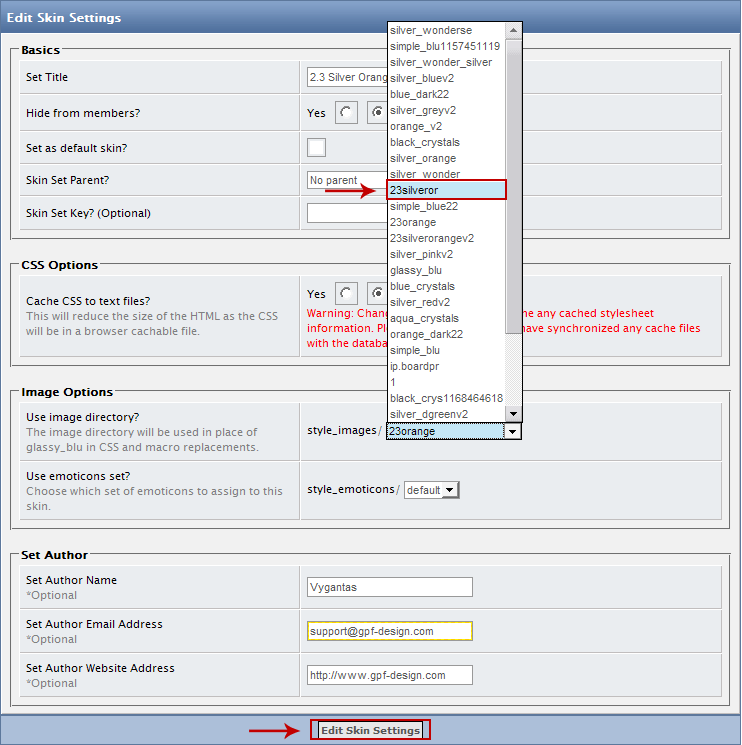
Now find "Image Options" and select imported skin style_images/ folder. It's usually first few skin symbols OR just various numbers.
Once you've chosen style_images/ folder, scroll down and click "Edit Skin Settings".
Once done, click on the right icon to make it default skin like in example.

After clicked it should show something like this:

That's all :-)
Back to Home Page | Bookmark (CTRL+D)